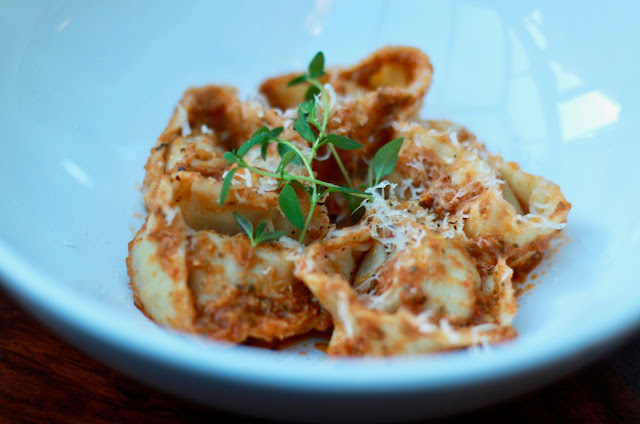
Oli has cooked A LOT of tasty things for me throughout our relationship but I have to say this is up there as one of my favourites (bonus that squash is in season at the moment so it makes it extra tasty). It's also a lot easier to make than you'd think!
The night before we intended to make the pasta we made the dough, this allows it to have enough time to rest before being rolled out. You will need 600g of Pasta Flour and 6 whisked free-range eggs. Mix the flour and eggs with your finger tips until it begins to feel like breadcrumbs and then knead with palm of your hand until the dough is a silky texture.
Once your dough is thoroughly kneaded, cling film and place in the fridge and leave overnight. (We spent the rest of our night carving pumpkins and playing with cattos).
The following morning we began the cooking process. We started off by preparing the Butternut by cutting it in half, scooping out the seeds, and scoring to allow the herbs to infuse. We used a small bunch of roughly chopped Sage & Thyme, and then added A Clove of Garlic, seasoned with Salt & Pepper and then finished with a slab of Butter and a tablespoon of Olive Oil.

We then wrapped the butternut in foil and placed in the oven - Preheated to 180 - for roughly 1hour 30mins or until you're able to cut into it with ease with a blunt knife.
Now time for my favourite bit (aside from eating it) - cooking the Lardons! Once your Butternut is around 10 minutes away from being done, fry your Lardons at medium-high heat until crisp.
Once your bacon is nice and crispy, place on a piece of kitchen roll to allow the grease to soak out, then place in a food processor (if you don't have a processor finely chop the bacon and place in a mixing bowl).
Now that your butternut is also done, scoop out the contents and place into the food processor/mixing bowl, and finish off by grating some Parmesan into the mix and blend/mash until thoroughly mixed (we forgot to do this while it was mixing so we did it last).
Place to the side and allow it to cool for around an hour to avoid cooking the pasta when filling.
Once your filling is cool it's time to roll the pasta! Once again if you don't have one of these handy contraptions a rolling pin will do just fine. It's extremely hard to describe how the dough needs to be, but you want to roll it out until it's quite thin but feels silky and durable, when you're doing it you'll know!
This photo is the consistency you want!
I completely missed getting photos of the cutting process but we used a large mug as a template for our pasta portions, there are also pasta cutters available to give you a more clean cut! Now it's time to fill your tiny parcels of fun, place a dollop of mix into the centre and gently fold, seal the edges with a fork and carefully bring the two corners towards each other.
It's almost time to eat! Bring your pan up to the boil and carefully place the parcels into the water and cook for 2mins 30.
Strain the pasta and mix with Sun-Dried Pesto, then place it into a bowl (6 parcels are enough for one portion as it's a very rich pasta) and garnish with Parmesan and fresh Thyme.
And there you have your own homemade Tortellini! It is honestly the most delicious thing, as time consuming as it is, it's well worth putting the effort in.


No comments
Post a Comment